Thursday, November 13, 2014

Sand Foam

Have you made Sand Foam yet?  I was inspired to try it from blogger PagingFunMums.  Especially since it is only 2 ingredients and we have lots
of sand on hand.
         IMG_1267
The second ingredient is shaving cream.  PagingFunMums said the the recipe
was 3 cups of sand to one can of shaving cream.  We didn't use a full can of shaving cream.
          IMG_1269
We put the 3 cups of sand in our big bowl then gradually added the shaving
cream till we thought it was a great consistency.
          IMG_1273
       But it became too wet so we had to add a bit more sand.
          IMG_1271
I expected the texture to still feel gritty because of the sand but it became
silky smooth.
  IMG_1276IMG_1278
        After mixing it we transferred it to individual trays at the table.
             IMG_1277
As it sat in the open air it dried out slightly so we added more shaving cream which allowed any new child to join experience the mixing.   Some were hesitant
to get their hands wet.
             IMG_1279
A stick helped her get involved and encouraged us to bring out more materials.
            IMG_1280
Shells and stones were added to the sticks then we went out for a walk in the forest to collect more.
         IMG_1316
We found pinecones, evergreen and cedar boughs, bark and maple tree seeds.
            IMG_1318
We began exploring how to build fairy homes with these materials.

Overall the sand foam didn’t last very long in the open air.  PagingFunMums did say, in the comment section, that it would last several days if sealed in a container.  We may try it again.

Wednesday, November 12, 2014

Splat Monsters

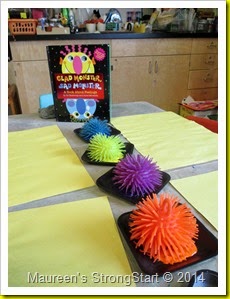
A simple toy from the dollar store was used in this fun art activity.
     IMG_1190 IMG_1189
I’m not sure what these are called but I thought they looked like little monsters.
    IMG_1201IMG_1202IMG_1203
                    IMG_1214
But as the children began to use them some thought the marks looked like
                                          fire works.
                  IMG_1284
                         Some thought they looked like sea urchins.
    IMG_1196IMG_1198IMG_1199
    But to others it didn’t matter because it was just fun making them splat.
      IMG_1283IMG_1285
                 IMG_1324
                  This child didn’t splat but swirled and smeared.
     IMG_1290IMG_1293
                  IMG_1292
                          One even made them bounce
                    IMG_1295
                             and then turned them into monsters.

Tuesday, November 11, 2014

A New Fairy Forest

The children continue their interest in fairies but unfortunately we haven't been able to visit Fair Lane because our city parks department has removed it after a complaint.
 IMG_5144 IMG_5210
While discussions continue with the city to rebuild Fairy Lane we decided to explore another forest.
  IMG_1233IMG_5199
This forest is beside our school which means we can visit it anytime.
              the three wishes
Before heading out to the forest we enjoyed the story of The Three Wishes.  A fairy tale about a poor woodcutter who is given three wishes by a tree fairy. After thinking very hard about the things he would like to wish for, he ends up wasting all his wishes on undoing the damage caused by his other wishes.
    IMG_5147IMG_5148
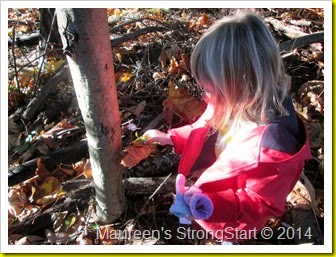
We don’t know if fairies live in this forest so I explained to the children that as we walk through the forest they are to choose a tree that they think a fairy might like to live.  Then tie a silver ribbon on a branch and make a wish.
    IMG_1235IMG_1238   IMG_1246IMG_1244
The silver ribbons are hidden on the branches spread throughout this green space.
    IMG_5200IMG_5198
                         IMG_5199
After some of the children finished tying their ribbon on a branch I noticed one child covering it with leaves and another child collecting sticks.
                           IMG_5188
Tomorrow when the children arrive at school they will find an invitation to create fairy homes using leaves, sticks, pinecones and play dough.
                  book 2
Our library has several of Tracy Kane’s Fairy Houses books that we will use for inspiration.

Monday, November 10, 2014

Button Trays

          IMG_0969
A trip to the dollar store inspired me to find The Button Box book again. 
 IMG_0980IMG_0981
          Buttons are enjoyed by both children and adults.
 IMG_1014IMG_1019
The first day the buttons were available I noticed that most of our toddlers loved dumping the buttons and running their fingers through them.
        IMG_1083
Day 2, I added trays which helped keep the buttons contained, off the floor
             and little ones' mouths, and easier to clean up.

As I watched, I noticed...
 IMG_1053IMG_1055
the older children being more thoughtful on how they used the buttons
 IMG_1065IMG_1068
                        and where they placed them.
   IMG_1081IMG_1082
I saw preference for colour and size.  The colour most often chosen was purple.  They preferred the large buttons over the small.  I’m guessing because they were
                                 easier to pick up.
 IMG_5154IMG_5155
As the children played they learned about colours, sizes, shapes, patterns.  They worked their small finger muscles, as well as crossing the midline of their body when they reached for more buttons.