Sunday, February 9, 2014

Making the Drawbridge

Every castle needs a drawbridge.  “That door that goes over the water” as the children put it.  I borrowed a toy castle from the kindergarten class to look at how the drawbridge worked.
      jan 23 029 jan 24 018
After working it a few times we learned how to attach the string to our door.
  jan 28 011 jan 28 012
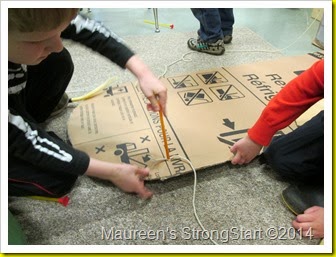
Using a pencil, as a simple tool, we poked holes in the cardboard then pushed
the string through.
                    jan 28 013
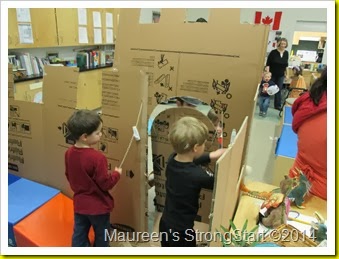
Once that was complete the boys pulled up the drawbridge but quickly realized that it wouldn’t stay up.  One of them suggested we needed to tie it.
   jan 28 019 jan 28 023
I happened to have removeable wall hooks with sticky backs (if you have a chance to visit my centre you will see the size of my storage room and that it is very full).  We attached the hooks at the sides of the door and they tried it again.
    jan 28 025 jan 28 026
We also learned that we needed a system to let the people inside know that someone wanted in so the door wouldn't get ripped.  Knocking works well and waiting for the drawbridge to be lowered taught us patience.
    jan 28 027 jan 28 030 
                  It's a success and still surviving after a week of use.

Saturday, February 8, 2014

Building the Castle

We are very fortunate to live in a community with generous spirit.  A family that use to come to StrongStart, whose child is now in grade 2, owns the local Sears store.  They have been generous in saving me boxes for our projects this school year.  Well they topped their generosity by delivering the boxes needed for the castle right to our school’s front doors.
          jan 23 008N
And we were excitedly welcome them and watched the two delivery men carry the boxes into the school.
jan 23 009 jan 23 010
Some were even dressed to show their enthusiasm.
         jan 23 035
We didn’t have time to put the walls up that morning so after school I asked a father who was waiting for his older child to give me a hand.  He helped move the boxes, slit them open and patiently waited for me to decide which way they were to go.
jan 23 036 jan 24 009
The big chair was added for a throne, the slide is the tower and a table was set with silver goblets and jewels ready for the next morning.
        jan 24 028
The top of the walls were notched to make a crenelated wall.  An opening was added to move in and out.
                    jan 24 025
During the morning, as the families arrived, many ideas were being discussed for what was needed in the castle.  So we started a list.  This may be our guide in the direction we go in the next couple of weeks.
jan 24 023 jan 24 024 jan 30 015
One family decided that the castle needed a fire place.  The mom cut bricks in different lengths and showed the children how to pattern them in an arch.  The child went to the art area and found tissue paper for the fire.
            jan 24 011
And the play continued all around.


Thursday, February 6, 2014

Castle – the Design Stage

In the next four of five posts I'll be sharing our latest project.

Before Christmas I noticed that there were a group of children playing
with the swords, shields, dragons and king outfits.  After we returned
from the two week holiday the play continued.
                 jan 16 004
I wanted to understand what the children's interests were about that era,
about castles, and about knights.   Was it more than knights fighting?

            jan 13 039
jan 16 007 jan 16 005
I invited the children to draw what they know about castles with the
prompt, “If we were to build a castle what would it look like?” 
Books from the library were provided for further investigation.

 jan 13 016 jan 13 040   
    jan 20 008 jan 20 031
jan 20 012 jan 20 032
 jan 9 009 jan 13 041
Over the past two weeks we’ve had several discussions of what is needed for a castle.
           jan 20 033
They came up with lots of ideas for protection of the castle.  Next we will take our ideas from print to building.

Wednesday, February 5, 2014

Sticky Easel

I popped over to Pink Stripey Socks awhile back and was inspired by a craft they
                  did.  It was simple; add yarn to faces for hair. 
           jan 30 003
Instead of doing it as a craft I set it up on the easel with sticky paper.  The
sticky paper is mac tac and it’s facing out so the yarn will stick to it but can be
                             peeled off again and again.
 feb 4 053 feb 4 054
           I used the lower easel so the toddlers could reach it.
        jan 30 057
It gave us an opportunity to talk about hair.  About different colours, where it
              grows on different faces and is all hair straight.
feb 4 059 jan 31 045
                       Each day the faces looked different.

Tuesday, February 4, 2014

Love Bomb

                Have you seen No Time For Flashcards “Love Bomb”

                      When I saw it I knew we would have to try it.
     feb 4 009 feb 4 010
                             We did it as a cooperative art project. 
The children spent half the morning using scissors and hole punches to make the
                        pieces of paper to put in the paper bags. 

 Thankfully a few adults helped out too.

            feb 4 020
I prepped the canvas differently by taping our hearts down first and then letting
                                  the children spread glue all over.
         feb 4 028 feb 4 029
                               Then we started popping the bags.
      feb 4 032 feb 4 043
          Popping and popping.  Almost every child, that wanted to, had a turn.
  feb 4 036 feb 4 038 feb 4 033
Sometimes it was hard to pop the bag but once it was the bits of paper were
                                    sprinkled all over the canvas.  

We put it aside to dry for a bit.

   feb 4 048 feb 4 052
Then  it was time to peel off the green hearts.  We had to find them first, hiding
                                  under all the coloured bits.
       feb 4 073
         This is our Love Bomb, even the green hearts look splendid.
feb 4 086
 I took some time this afternoon to document and post it in the hall way. 
            Maybe to inspire other classes to give it a try.