Wednesday, December 17, 2014

Snap Blocks

                     IMG_0006
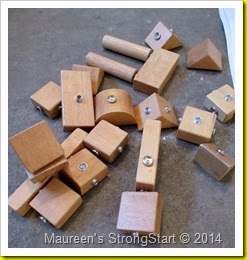
A few months ago I shared the snap blocks I had made with a fellow StrongStart facilitator.  I finally had a chance to put them out for the children to play.
IMG_5159
IMG_5160
IMG_5161
IMG_5162
Once they figured out how they went together they started to build.
IMG_1317
The fact that the blocks spin once they are together was a lot of fun.
IMG_1392IMG_1393
IMG_1391
Enjoyed watching these two working side by side then smoothly start working together.


Monday, December 15, 2014

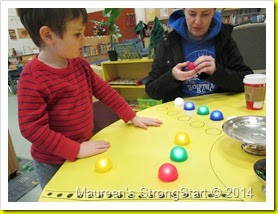
What Do We Do With This?

                       IMG_1956
    I set this table last week and the question I heard most often was
                           “What do we do with this?”
               IMG_1957
                                       My answer – ”explore”. 
     IMG_2065IMG_2010
IMG_2053IMG_2020
                      And that’s what the children and adults did.
    IMG_2023IMG_2052
IMG_2013IMG_2063
They sometimes worked with the marks I had drawn on the paper that
                                         covered the table.
IMG_2073 They followed the lines.
          IMG_2074
        They matched the coloured lights and worked between the lines.
             IMG_2029
Some children worked together to see what they could create with the materials.
IMG_2022Can you guess the pattern?

      IMG_1959IMG_1968
The lights drew the most interest with adults and children.  The children liked that they could turn the lights on and off themselves. 
Tomorrow when they arrive at school they’ll find the table has changed but the focus will still be on lights.

Friday, December 12, 2014

A Rubber Ramp

Our school district resource centre has purchased several new ramp kits. 
I’ve reserved one a month for the next few months. 
         IMG_1918
The first kit we borrowed is a rubber ramp.  The children and parents love it.  It looks like recycled materials which is pleasing for parents and I believe is giving a few the idea to try to make their own.
                IMG_1850
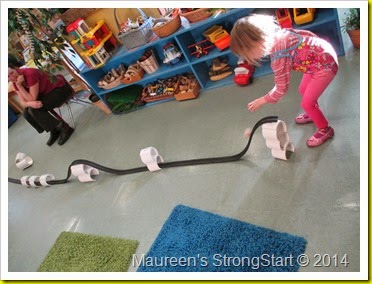
This kit has a really long rubber piece that stretches across our room. 
Because it’s so long we needed to curve it back on itself.
               IMG_1852
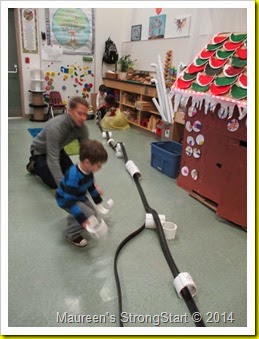
The first day the adults started by stretching the rubber out and adding some of the tunnels/supports.  But the children soon took over and tested and changed the design.
       IMG_1877IMG_1879
     Each day after the children tried variations of hills and tunnels. 

This is a very active activity with the children running back and forth to get
their ball and let it go again.
        IMG_1851IMG_1895
                   IMG_1882
This ramp kit has been so exciting to have in our program.  It encourages the children to think of design, hills, slopes, tunnels, and speed of the ball.

          Everyone who tried it was very excited to watch the ball go.
                      IMG_1964
The only thing I wished is that the rubber ramp came in two pieces that weren’t so long.  We took it into the gym one day and was able to stretch right out.  Other than that it is a wonderful piece of equipment for all ages.

Our district purchased it from Kodo, a website worth looking at for other inspirations.
Wednesday, December 10, 2014

Reindeer Toast

            IMG_1995
This week’s Make-a-snack was Reindeer Toast. I prepared the toast this time since each child would just use a quarter of one piece.
               IMG_1996
       IMG_2004IMG_2005
              IMG_2006
We learned the word 'antler' when we added the pretzels.  And we talked about the raisin eyes and that it was difficult to see them on the toast so some children chose to use Cheerios instead.
              IMG_5291
The cherry nose prompted many children and their parents to call the toast Rudolph and talk about that story.
       IMG_1997
                                     Our photo recipe.

Tuesday, December 9, 2014

Frosted Window Art

                 IMG_1946
It snowed a bit last week which was exciting but it didn’t last long.  I saw this art idea at Kinder Kraze and thought it would help make our room a little more like winter.
            IMG_1923
The table was set up for a couple of days so we could create lots of windows
to decorate our windows.
  IMG_1939 IMG_1951
        A snowflake shaped hole punch was used to make the snowflakes.
        IMG_1952IMG_1940
It’s very simple to make, spread glue on to waxed paper, place tissue paper and snowflakes on top then spread more glue over everything.  I diluted the glue with water so the waxed paper wouldn’t curl when it dries.
   IMG_1937IMG_1947

Our decorated windows…
           IMG_1986
                         from the inside,
           IMG_1987
                                                    and the outside.