Tuesday, September 3, 2013

First Day Back to StrongStart


Coming back to school is so exciting. 
Seeing old friends, meeting new ones. 
Seeing what’s different, what has changed and what looks familiar. 

Here is a glimpse of our first day.
             sept 03 023
Collaborative art piece for our sign in this week.
              sept 03 013
A new toddler block exploration area, just the right height.
sept 03 009 sept 03 015
Feeding and taking care of the babies.
sept 03 008  sept 03 016
Cars, planes and ramps played in a variety of ways.
         sept 03 019
Checking out our new fuzzy caterpillar.
sept 03 024 sept 03 047
Campsite dramatic play.  Roasting marshmallows and keeping the fire under control.
        sept 03 028
A new climbing space for the pre-walkers.
sept 03 045  sept 03 051
Play dough, puzzles and self invented games.
       sept 03 032
Lots of art both at the easels and the ‘make-it’ table.
       sept 03 041
And story time. 

Tuesday, July 23, 2013

Building Together

I bought a small table that needed to be assembled so I asked one
of our grandparents if he would do it for me.
          feb 26 029
It didn’t take long for the children to join in the building.
 feb 26 033 feb 26 034
Discovering each part and tool.  Wondering how does it fit together?
feb 26 036 feb 26 037
Having the opportunity to figure it out themselves.
feb 26 038 feb 26 040
Using their strength as well as their problem solving skills.
       feb 26 041
Watching as each piece fit together matching the plans that were provided.
feb 26 045 feb 26 047
Taking turns, working on precision and accuracy, and learning about new tools.  I need to find more projects like this.

Monday, July 22, 2013

June’s Play Trays

           june 10 008
  june 11 036 june 11 049
Sea shell matching.  I took photos of each shell and taped
them to the tray.  As the children pull a shell out of the
sandbox they match it to the picture.  I also included a
guide to the names of the shells.
         june 11 012
 june 11 061 june 12 079
Grace, my practicum student, made this tray of an octopus with
dotted legs.  She added flat bottom marbles to count and place
on each dot.
             june 12 080
 june 13 059 june 10 016
A game in which as the fish turn they open and close their mouths. 
The children try to catch them with a fishing rod. 
Not as easy as it looks.
             june 18 039
 june 17 010 june 17 011
I painted the underside of shells to play a colour matching game. 
 june 17 007 june 17 014
                         june 19 026
Sea creatures to sort in different ways; colour, type, etc.
 june 18 005 june 18 036
Grace made a discovery bottle.  She used blue aquarium rocks to
partly fill the bottle then added fish, shells, glass beads to roll and
find.  Before putting each item in the bottle she took a picture and
made a guide to help the children find them all.
 june 18 087 june 18 128 
A fish, sea shell, octopus and jelly fish bath tub mat turned upside
down to place marbles on each suction cup.

Friday, July 19, 2013

Wet Felting

                july 15 003
This year I learned a new technique for wet felting using a ziplock bag.
           march 5 008
You need wool roving, ziplock bag (we used a large bag), dish soap and water. 
Gently pull the roving apart in small pieces and layer it in your ziplock bag. 
Do several layers changing the direction you lay the roving for each layer. 
This will be the background of your piece.
           march 5 047
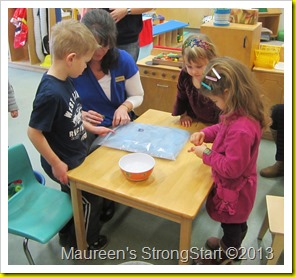
Next I had the children choose the colour of roving they each wanted to
use and had them pull a piece apart and place it on the background
colour. 
march 5 054 march 5 055
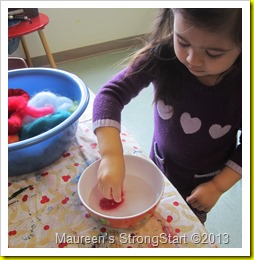
In the pictures above I had them dip their piece of roving in water first,
I won’t do that again as it proved to be unnecessary.
                 march 5 056
Once all the pieces are in the bag, spray it all with water and squirt some
dish soap in the bag.  Seal it and then let the children rub and rub and rub.
march 5 057 march 6 020
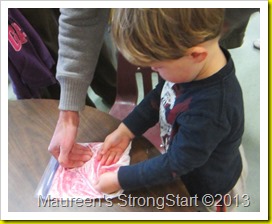
Flip it over and keep on rubbing.  Pass it around and let everyone have a turn.
  feb 14 018 feb 14 028
As you rub, the agitation, the soap and water helps the wool felt together.  Be
sure you rub the edges too otherwise you’ll be able to pull it apart when you
take it out.
       july 15 001
As an adult it took me about 15 minutes of constant rubbing to finish the
felting project.  So it may take all day with children helping depending on
their interest. 
To test if it is finished, open the bag and gently tug on the wool.  If it
doesn’t pull apart then it is done but if it does then close bag again and
keep rubbing.
When you think it is finished take it out of the bag and gently rinse it
under running water then lay flat to dry.
     may 28 011
This is the only photo I have of the the big group project
(framed on the wall in the top left corner of photo).