Thursday, February 5, 2015
Wednesday, February 4, 2015
Pear Tarts with Bread Pastry
I found a recipe using slices of bread for the crust of mini-quiches. Simple and inexpensive, perfect for our program. But we still have a lot of pears left from our Fruit & Veggie program so decided to make Pear Tarts instead of quiche.

Start with slices of white bread (you could use whole wheat too) and cut out circles. The size of the circle will depend what size of muffin pan you are using. We used a mini-muffin tin so was able to cut 3 circles from one slice of bread.

I pre-cooked the pear filling (pears, sugar, flour, cinnamon and lemon juice) but had the children dice a few more to add to help it cool.

When the children arrived and we were ready to start, I gathered all the materials – bread circles, pear slices, rolling pins, and mini-muffin pan that was sprayed with Pam.


The children rolled a circle of bread flat then pressed it into the pan. We toasted them, in the oven, for about three minutes before filling.

My helper. Any time she saw me with a bowl or a mixing spoon she came running.

Bake in the oven for about 12 minutes at 350F. Let them cool before eating.

I managed to get one picture before they were all eaten. They are delicious
and taste like toast with pear jam. YUM!
Start with slices of white bread (you could use whole wheat too) and cut out circles. The size of the circle will depend what size of muffin pan you are using. We used a mini-muffin tin so was able to cut 3 circles from one slice of bread.
I pre-cooked the pear filling (pears, sugar, flour, cinnamon and lemon juice) but had the children dice a few more to add to help it cool.
When the children arrived and we were ready to start, I gathered all the materials – bread circles, pear slices, rolling pins, and mini-muffin pan that was sprayed with Pam.
The children rolled a circle of bread flat then pressed it into the pan. We toasted them, in the oven, for about three minutes before filling.
My helper. Any time she saw me with a bowl or a mixing spoon she came running.
Bake in the oven for about 12 minutes at 350F. Let them cool before eating.
I managed to get one picture before they were all eaten. They are delicious
and taste like toast with pear jam. YUM!
Tuesday, February 3, 2015
Magnets on Metal Extensions
Last week I shared this post about playing with magnets and tin cans. At the end I asked for ideas on how to extend it. Thank you to everyone who shared their ideas. The following is what was added.


Milk jug lids with magnets on the backs; some of them I glued wiggly
eyes on the inside. They were a hit.


Pipe cleaners but the children didn’t show much interest. I wonder if
they were brighter colours would they have been drawn to them.


I dug out these magnet clips that are shaped like bugs and butterflies.
They had a lot of fun moving them around.


A few of our discovery bottles might work with magnets; nuts and bolts,
iron filings, and bingo chips with metal edging. They used the wands to
try to move the pieces inside around.
Then as the week concluded I moved the small metal pieces into the
sensory table with the magnet wands and covered it all with paper confetti.


They slid the wands through the confetti and checked what was stuck to it
when they pulled it out.
Thanks again to everyone who sent me emails with ideas.
Milk jug lids with magnets on the backs; some of them I glued wiggly
eyes on the inside. They were a hit.
Pipe cleaners but the children didn’t show much interest. I wonder if
they were brighter colours would they have been drawn to them.
I dug out these magnet clips that are shaped like bugs and butterflies.
They had a lot of fun moving them around.
A few of our discovery bottles might work with magnets; nuts and bolts,
iron filings, and bingo chips with metal edging. They used the wands to
try to move the pieces inside around.
Then as the week concluded I moved the small metal pieces into the
sensory table with the magnet wands and covered it all with paper confetti.
They slid the wands through the confetti and checked what was stuck to it
when they pulled it out.
Thanks again to everyone who sent me emails with ideas.
Shadow Art 2015
We finished our focus on shadow and light with a couple of art activities.

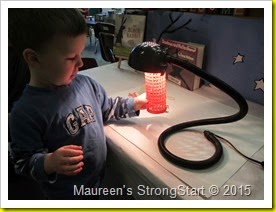
The first was tracing shadows. We set up two lamps so more than one
child could work at this at the same time.

I referred to the lights as the sun and we angled it low to make the shadows
longer.

I hoped we could use oil pastels for this activity but the tip of the pastel was
to thick for tracing so we brought down the pencils.


I’ve mentioned before that younger children may have a difficult time seeing the shadow. But once it was pointed out, the white paper helped, then they were able to trace around it. The older children more so because it took a lot of fine
motor skill.


This child worked hard to set up the mini colander just so and then trace the
marks. We thought it looked like a strawberry with seeds.
The other art activity was using stencils and chalk pastels.


It is the same skill as the first activity but simpler because the stencil is a solid form to trace. This child really enjoyed this activity and did several pieces of art.


On to her second work; love her focus and the brush of chalk on her cheek from
pushing up her glasses.


And just like tracing a shadow some children couldn’t see the outside of the
stencil and started on top of it.


I really enjoyed this art. This is my piece, I overlapped the stencil and used
different colours.
The first was tracing shadows. We set up two lamps so more than one
child could work at this at the same time.
I referred to the lights as the sun and we angled it low to make the shadows
longer.
I hoped we could use oil pastels for this activity but the tip of the pastel was
to thick for tracing so we brought down the pencils.
I’ve mentioned before that younger children may have a difficult time seeing the shadow. But once it was pointed out, the white paper helped, then they were able to trace around it. The older children more so because it took a lot of fine
motor skill.
This child worked hard to set up the mini colander just so and then trace the
marks. We thought it looked like a strawberry with seeds.
The other art activity was using stencils and chalk pastels.
It is the same skill as the first activity but simpler because the stencil is a solid form to trace. This child really enjoyed this activity and did several pieces of art.
On to her second work; love her focus and the brush of chalk on her cheek from
pushing up her glasses.
And just like tracing a shadow some children couldn’t see the outside of the
stencil and started on top of it.
I really enjoyed this art. This is my piece, I overlapped the stencil and used
different colours.
Friday, January 30, 2015
Exploring Shadows
For the past month we have been exploring light and dark, black and white.
This led us to using light to create shadows.


The children recognize the light, and everything between the object and the light, but finding the shadow that lays on the table behind the object is very difficult.

As the children played with the items on the table they created a spot light which
prompted me to get out our crank flashlights.


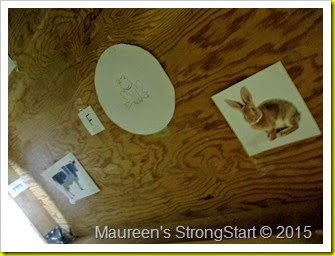
The only dark place, in our room to use the flashlights, was under the table.
Turned out the children liked the little hide away.

I decided to give them something to search for.

I printed pictures of a bunny, cow, dinosaur, eagle and letters A-F.

As we were discovering the pictures and letters, this child noticed that B goes with bunny. Together we matched the rest of the letters to pictures but noticed that two letters didn’t have pictures to match.


A and F were missing pictures. When asked what starts with A (ah) she thought and said "apple". I encouraged her to draw a picture to add under the table.

Then we worked on the letter F and decided to draw a frog but she said she didn’t
know how to draw it so I volunteered.

For a few days I left this message on top of the table.


More children discovered the pictures and letters.
It’s wonderful learning when the unplanned happens!
This led us to using light to create shadows.
The children recognize the light, and everything between the object and the light, but finding the shadow that lays on the table behind the object is very difficult.
As the children played with the items on the table they created a spot light which
prompted me to get out our crank flashlights.
The only dark place, in our room to use the flashlights, was under the table.
Turned out the children liked the little hide away.
I decided to give them something to search for.
I printed pictures of a bunny, cow, dinosaur, eagle and letters A-F.
As we were discovering the pictures and letters, this child noticed that B goes with bunny. Together we matched the rest of the letters to pictures but noticed that two letters didn’t have pictures to match.
A and F were missing pictures. When asked what starts with A (ah) she thought and said "apple". I encouraged her to draw a picture to add under the table.
Then we worked on the letter F and decided to draw a frog but she said she didn’t
know how to draw it so I volunteered.
For a few days I left this message on top of the table.
More children discovered the pictures and letters.
It’s wonderful learning when the unplanned happens!
Subscribe to:
Posts (Atom)