Friday, January 9, 2015

Pom Pom Play

IMG_2241
This activity is easy to set up – black, white and black and white pom poms, tubes taped together and two types of pinchers.
    IMG_2260IMG_2261
The fun part was to pick up the pom poms and transfer them into the tubes.
IMG_2356IMG_2358
The tricky part was figuring out how to use the pinchers. 
                     IMG_2357
They had to learn to squeeze their hand in order to open the mouth part then release to close it after capturing their target.
       IMG_2399 (2)IMG_2400IMG_2401
I appreciated watching his focus and determination to work the pincher and successfully move the pom pom.  He completed one then another before moving on to another activity.

Thursday, January 8, 2015

Fingerpainting on Cellophane

I was given a bunch of used cellophane – the kind that you wrap flowers in – and today put it on the art table with paint.  The children loved it.
  IMG_2371IMG_2373
I also had some leftover hair gel that I thought would make the paint move smoothly on the cellophane.  We added a bit of sparkle to the gel but once we added paint it couldn’t be seen any longer.
  IMG_2377IMG_2378
We’ve been focusing on black and white this week so those were the two colours available.  This little girl giggled as she smeared the paint on the cellophane.
     IMG_2366IMG_2367
      This child's hands looked like they were ballet dancing.
                 IMG_2384
              Such a fun way to exercise our finger muscles.
IMG_2376IMG_2380
She painted a rainbow on the white paint then added black paint before making a print.
             IMG_2381
I was initially concerned that the cellophane would be too slippery but I noticed that the parents were engaged with their child’s painting by holding the cellophane in place.
                   IMG_2368
                                  IMG_2397
                             Each print is beautifully unique.

Wednesday, January 7, 2015

A Rudolph Bus

                    IMG_2240
We started out the new year with a new box (well a recycled box freshly covered). 
          IMG_2272IMG_2273
We cut out windows and doors and made it into a bus.  
But what kind of bus will it be? 
                IMG_2286IMG_2287
As the children drove the bus we talked about what colour it should be painted and a few children kept saying “reindeer bus”, “Rudolph bus”. 
                            IMG_2335
At first I was confused till I remembered that over the Christmas season one of our city’s transit buses is decorated like a red-nosed reindeer.
    IMG_2337IMG_2341
So today we painted a red nose on the front, used old cds for the eyes and wrapping paper tubes for antlers.  We even added lights around the top.
                                  IMG_2340
Next week we’ll visit the transit bus maintenance yard to learn more about what is inside a bus.


Tuesday, January 6, 2015

Painting on Ice

               IMG_2276
Our play trays this week contains watercolour paints, brushes and blocks of ice.
               IMG_2244
I put the blocks of ice on the trays about 20 minutes before I opened the centre
so they were somewhat melted when the families arrived.
                   IMG_2247
Monday the school was fairly cold, after being closed for two weeks, so the
ice lasted quite awhile.
                      IMG_2256 (2)
That gave the children plenty of time to experiment with a good size block of ice.
             IMG_2252
As the morning progressed and the room warmed, there was more water on the
tray to really make a lot of colour.
           IMG_2302
The ice provides a slippery surface so the brush glides across it and the paint will
pool in any little holes or cracks.
It was a new experience for many and some children were fascinated with the
temperature of the ice and having the freedom to paint all over.

Monday, January 5, 2015

New Sand Structure

              IMG_2234
Raymond created a new toy for us over the Christmas break.  The inspiration came from KodoKids, the site where we bought the rubber ramp kit.
                  IMG_2233
I had hoped it would be a bit shorter so I could set it on a toddler sized table but since it isn't I placed it in a wading pool on the floor.
   IMG_2248IMG_2249 (2)
                   IMG_2255
IMG_2268IMG_2269
It works well on the floor for all the children even our youngest.
IMG_2257IMG_2258
It has funnels, scoops, tubes and cups.  The longest tube is see through which the children enjoy watching fill up.
                          IMG_2271
I’m very excited to watch how the children will use their bodies as they explore this new structure.  No one has climbed in yet but I expect it will happen.

Thursday, December 18, 2014

Growing Candy Canes

Don’t you just love, and hate, browsing through Pinterest and find an idea you just have to do even if time is limited?  That’s what happened this week.
                 IMG_2100
123Homeschool4me has shared print outs for growing candy canes.  I love magical activities like this and knew we had to try it even though we had four days left of school before Christmas break.
                              IMG_2097
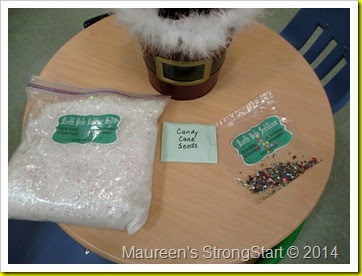
The seed packet is fantastic in its detail.  Directions of how to plant, with what materials to how long it will take to germinate.  I really appreciated that it looks like a seed packet.
                          IMG_2147
The only change I made was which candy I used as the seed.  That was because being short in time I couldn’t run around to find the red mint candy.  The first store I visited had these Christmas candy corn and candy canes to match in colour – perfect!
     IMG_2134IMG_2136
On Tuesday, I had a smaller group at circle time which worked well for this activity.  I introduced the idea of candy canes growing.  Has anyone ever heard of growing candy canes?  Have they seen a candy cane seed before? 
   IMG_2137IMG_2138
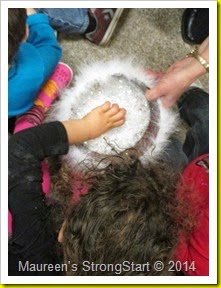
After showing them the package of seeds and what the seeds look like, we filled our planting pot with North Pole Potting Snow.  Each child received a seed to plant in the pot. 
                 IMG_2102
We left the North Pole fertilizer for children that would be attending an evening session that night.  But we ended up being busy doing other activities and forgot.
                         IMG_2174
The seeds didn’t need it.  We were thrilled to find that they had sprouted overnight. There were lots of candy canes at all different heights.
       IMG_2192IMG_2194
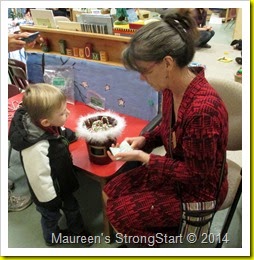
At the end of this morning, as the children were leaving, I reminded them of what the seeds looked like then they harvested a candy cane.  The roots were long and they had to brush off the snow.
                        IMG_2195
                  The best part was the Merry Christmas hugs. 
       Be sure to visit 123Homeschool4me to access the printables.